AC refrigerant leak symptoms: low charge or airflow?
Quick answer
Possible AC refrigerant leak symptoms include weak cooling, long run times, ice on the evaporator or suction line, and an oily trace or electronic-detector response at a leak point. None proves a leak alone. Restricted airflow, a dirty coil, control faults, and incorrect installation can look similar, so airflow and operating conditions should be verified before a certified technician judges charge and locates the leak.
Common questions
- What is the most reliable sign of an AC refrigerant leak?
- A repeatable response from an appropriate leak-location method at a specific point is stronger evidence than comfort symptoms or pressure readings alone. Electronic detectors, bubble solution, ultrasonic testing, and other approved methods may be used according to the equipment and detector instructions.
- Does ice on an AC line always mean low refrigerant?
- No. Low refrigerant charge can contribute to icing, but restricted airflow, a dirty evaporator, blower problems, metering faults, controls, and operating conditions can produce similar evidence. Let the system thaw and verify airflow before evaluating charge.
- Can a homeowner add refrigerant to an air conditioner?
- No. EPA Section 608 certification is required for work that can open the refrigerant circuit, including attaching gauges or adding refrigerant. A homeowner can check the thermostat, filter, registers, and visible outdoor obstructions without opening equipment panels.
Source note: Reviewed August 2026 against current EPA Section 608 guidance and a U.S. Department of Energy air-conditioner diagnostic guide. Equipment-specific limits, charging targets, leak-test methods, and repair procedures must come from current OEM service information.
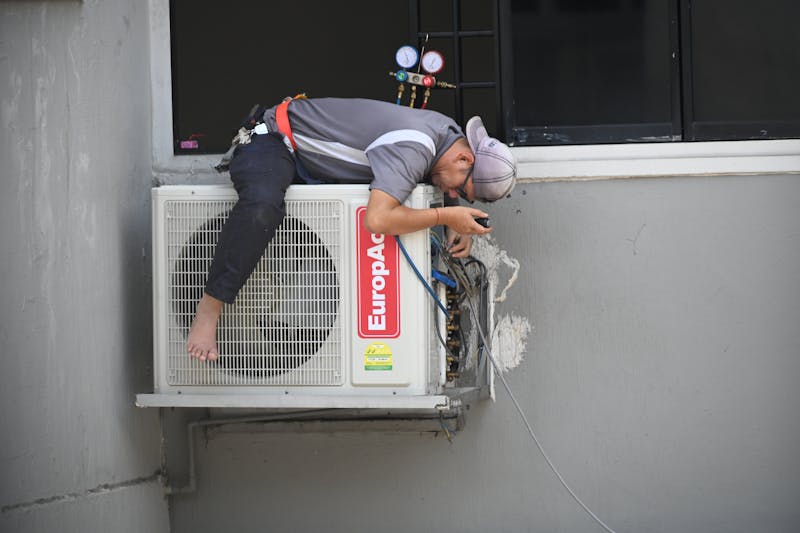
An air conditioner that runs constantly, cools poorly, or develops ice may have a refrigerant leak—but those symptoms do not confirm one. A clogged filter, weak blower, dirty evaporator, closed registers, control problem, or incorrect original charge can create a similar complaint.
The practical answer is to check safe airflow basics first, stop cooling if the system is iced, and have a qualified technician test the complete operating pattern before adding refrigerant. On a previously correct sealed system, a low charge usually means refrigerant escaped somewhere; repeatedly topping it off does not repair the cause.
AC refrigerant leak symptoms at a glance
| What you notice | Could support a leak diagnosis | Common look-alikes | Best next check |
|---|---|---|---|
| AC runs a long time but misses the setpoint | Reduced refrigerant mass can lower capacity | Extreme weather, dirty filter or coils, duct loss, undersizing | Compare indoor conditions, airflow, and equipment performance |
| Supply air is not as cool as usual | The evaporator may not be absorbing heat normally | Incorrect thermostat mode, outdoor-unit fault, low airflow | Confirm the outdoor unit operates and the filter is clean |
| Ice appears on the larger insulated line or indoor coil | Low suction saturation temperature can allow icing | Restricted airflow, blower fault, dirty coil, metering problem | Turn cooling off, thaw completely, then diagnose |
| Hissing or bubbling is heard near equipment | Escaping refrigerant may make noise at some leak points | Normal equalization, condensate, airflow, or valve noise | Record where and when the sound occurs; do not open panels |
| Oily residue appears at a joint, valve, or coil | Refrigerant oil can travel out with a leak | Old service residue, water, or other contamination | A technician should clean and retest the exact area |
| The system has needed refrigerant before | Repeated loss strengthens the case for an unresolved leak | Prior incorrect charge or incomplete service record | Review invoices and ask how the leak was located and verified |
No single row is proof. Ice can be both a clue and a new airflow restriction: once frost covers the evaporator, air delivery falls further and the original pattern becomes harder to interpret.
What homeowners can check safely
Stay outside electrical and refrigerant compartments. Before scheduling service, you can gather useful evidence without removing a panel or connecting a gauge.
- Check the thermostat. Confirm it is in cooling mode, the setpoint is below room temperature, and the fan setting has not changed unexpectedly.
- Inspect the filter. Replace a visibly loaded filter with the correct type and size. Our HVAC filter guide explains why a more restrictive filter is not automatically better.
- Open supply registers and returns. Move furniture, rugs, and stored items that block airflow. Do not close multiple registers to force air into another room.
- Look for visible ice or water. Check the accessible insulated line near the indoor and outdoor units. Do not chip ice from a coil or line.
- Note the timeline. Record outdoor temperature, thermostat setting, run time, weak rooms, sounds, visible residue, and whether cooling changed suddenly or gradually.
If ice is present, switch cooling off. The indoor fan can help thaw the coil only if the equipment is safe to operate and water is not reaching electrical parts. Call for service if there is standing water, a burning odor, breaker tripping, damaged wiring, or uncertainty about safe operation. The broader common AC problems guide covers other no-cooling checks.
Why low airflow can look like low refrigerant
The evaporator needs enough warm indoor air moving across it. A loaded filter, fouled coil, incorrect blower setting, restricted return, closed damper, or duct problem reduces the heat available to boil refrigerant in the coil. Pressures and temperatures then shift, sometimes toward a pattern that resembles a charge problem.
That is why “the suction pressure is low” is not a complete diagnosis. The U.S. Department of Energy’s air-conditioner diagnostic guide discusses airflow, coil fouling, charge, and equipment faults as connected diagnostic factors. A technician can use an HVAC static pressure test and model-specific blower data to investigate restrictions before changing charge.
Likewise, normal-looking airflow at one register does not clear the whole air side. The coil may be dirty, the blower may be set incorrectly, a return may be restricted, or an iced section may already be blocking flow.
A defensible technician diagnostic workflow
Refrigerant diagnosis should produce a chain of evidence, not a one-number verdict.
1. Restore a valid test condition
Thaw an iced evaporator fully and correct obvious airflow defects. Identify the indoor and outdoor model numbers, refrigerant, metering device, filter, blower command, active stage, and recent service history. Measurements taken through an ice-covered coil are not a reliable basis for charging.
2. Verify airflow and load
Check heat-transfer surfaces, blower setup, static pressure or another approved airflow method, duct condition, and indoor load. Record return and supply conditions along with outdoor temperature. Variable-capacity, zoning, and dehumidification controls must be in a known operating state.
3. Evaluate the refrigeration pattern
Use the current OEM procedure for the exact matched system. Stabilize operation, then interpret pressures, line temperatures, temperature change, superheat, subcooling, compressor behavior, and airflow together. The superheat versus subcooling guide explains why neither measurement is a universal target.
Low charge may be plausible, but a restriction, metering-device fault, sensor error, mismatched equipment, incorrect commissioning charge, or test-condition problem can imitate part of the pattern. Do not add refrigerant merely to make one gauge value look familiar.
4. Locate and verify the leak
A pressure check or charging chart can indicate a charge problem, but it does not identify a leak location. EPA lists location-capable methods such as electronic detectors, bubble tests, ultrasonic tests, and gas-imaging cameras in its Section 608 technician questions and answers.
Choose a method compatible with the refrigerant and equipment. Search likely joints, valves, coils, and service points methodically, then reproduce and confirm the response. For new A2L equipment, follow the label, current OEM instructions, ignition-control requirements, and the site’s A2L refrigerant safety checklist.
5. Repair, recharge, and prove operation
After locating the source, discuss access, part availability, warranty, equipment age, refrigerant type, and the likelihood of further failures. Complete the repair using the manufacturer procedure, verify it with an appropriate test, evacuate as required, and recharge by the approved method. Finish with an operating record under stable conditions.
EPA prohibits intentional venting of most refrigerants and requires Section 608 certification for work expected to open the circuit. Its consumer guidance says to ask technicians to locate and repair a leak instead of topping off the system.
Repair the leak or replace the system?
A repair is easier to justify when the leak is isolated and accessible, the equipment is otherwise sound, a covered part is available, and the completed cost is small relative to replacement. Ask whether the quote includes leak location, recovery, the actual repair, verification, evacuation, refrigerant, and post-repair performance testing.
Use our home AC refrigerant leak repair cost framework to turn those items into comparable written scopes and expose exclusions before authorizing the work.
Replacement deserves a side-by-side estimate when the leaking coil is expensive or unavailable, the system uses costly legacy refrigerant, major components are near end of life, the equipment is mismatched, or the system has developed repeated leaks. Do not decide from age alone; compare the documented repair scope, warranty, expected remaining risk, and a properly sized replacement proposal.
Your next step
Homeowners: Send the service company your symptom timeline and ask for a written diagnosis that separates airflow evidence, charge evidence, and the confirmed leak location. Avoid any proposal that consists only of adding refrigerant without explaining why it was lost.
HVAC professionals: Use a repeatable conditions-first worksheet, attach readings and leak-location evidence to the work order, and note the verification method after repair. If the shop needs a compatible instrument, compare sensor technology and refrigerant listings in our HVAC refrigerant leak detector guide before buying.
Weak cooling and ice deserve prompt attention, but they are the start of diagnosis—not the conclusion. Verify airflow, establish valid operating conditions, locate the leak, and prove the repair before calling the job complete.

ThermalTechPro Team
Independent trade-focused editorial team